Vinyl’s unexpected comeback as a format for audiophiles was one of the many shockers of the pandemic. Audiophiles of all ages decided to get back into playing the 100-plus-year-old format for various reasons. Some people love listening to a musical format on which the engineers, producers and artists originally released the album. Others prefer the lack of blue light (digital screens). Others like the “ritual” of opening a record, dealing with the sleeve and gently placing the stylus in the groove. Others still like actually owning their music versus streaming. There’s a lot of compelling drivers behind vinyl’s rebirth.
Let’s take a look into the actual turntable, what makes it complicated and, briefly, the effort required in analog musical reproduction, and then dive into the sometimes complex world of audiophile turntable setup.
What Are the Parts of an Audiophile Turntable?
Before getting into the how’s and whys of analog music, it makes sense to define the parts of the magic we know as a turntable. Because this is oriented more towards beginner audiophiles, seasoned listeners may already be up to speed on the following terms. As this is an introductory examination on analog, more in-depth articles and videos may be found online.
- The base and/or plinth is the part of the turntable on which everything sits. It is the part of the turntable that comes in contact with an audio rack or some sort of platform. A turntable’s base serves a highly important function. One, it provides support for everything above. And two, it affords vibration absorption, since turntables, in general, are experts in picking up unwanted vibrations, which are converted to distortion. Depending on the cost and level of quality, the base may be a separate housing from the plinth. On other designs, the base and plinth are one and the same.
- Normally mounted in or under the base is a motor drive system, responsible for turning the platter. This drive system may be belt drive, direct drive, AC or DC and really, whatever high-tech designs engineers may create. Controlling the motor speed gives the familiar 33.33, 45 and 78 RPM speeds to play a modern record.
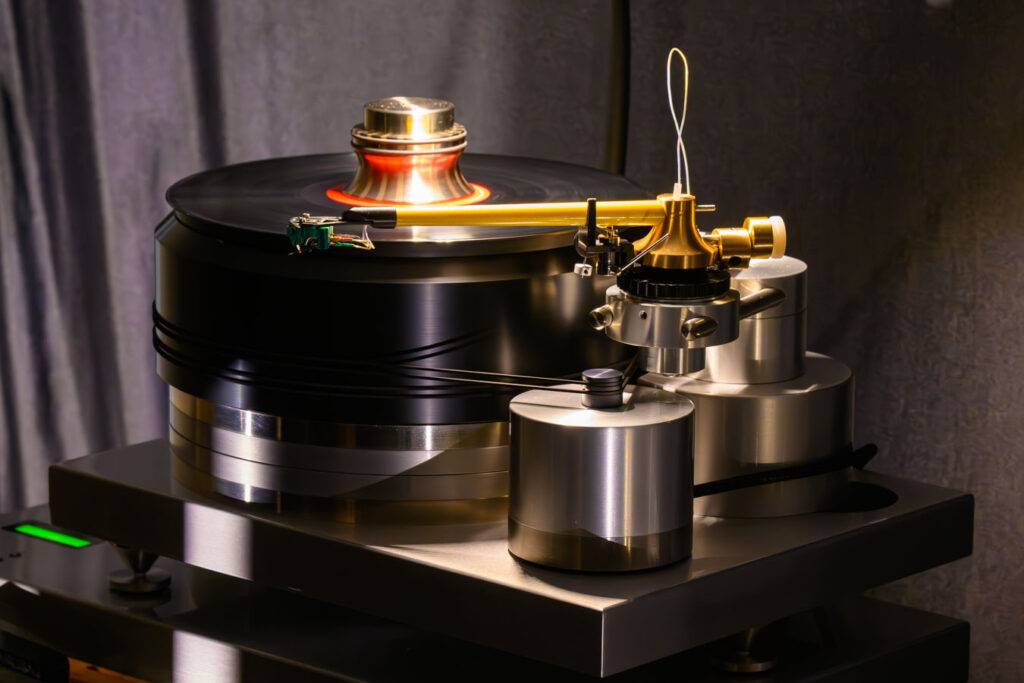
- The platter is the part of the turntable on which an LP is placed and also the part connected to the drive system. Platter materials range from machined aluminum, Delrin (a plastic material made by DuPont), or even combinations of metal and plastic. Most manufacturers will agree higher platter mass is better. However, not all manufacturers agree. Spoiler alert – turntable design is a widely debated topic.
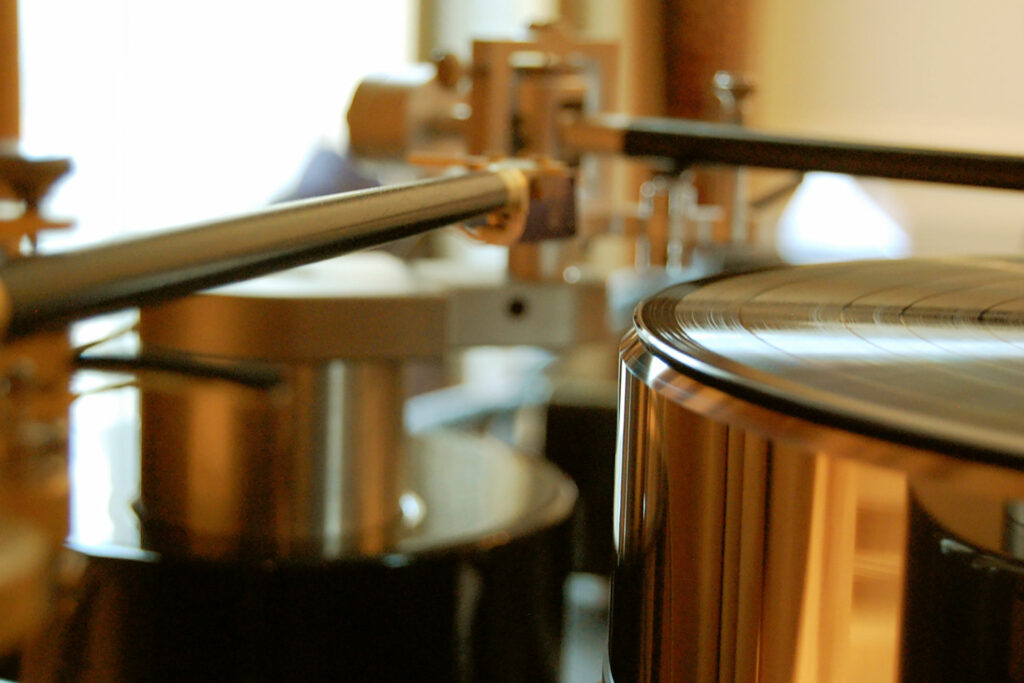
- Probably most visibly obvious on a turntable is the tonearm. This device has two principal purposes: to move along the record as the platter spins and house the cartridge. Tonearms connect to the base and/or plinth by an arm board, which fastens to the base and the tonearm itself. The tonearm pivot point is an imaginary vertical line from the center of the mounting base at the opposite end from the cartridge. This pivot point is important in setting up the tonearm and cartridge. A counterweight mounts at the very back of the tonearm, and is responsible for providing counterbalance, which controls the downward force of the cartridge on the platter.
- At the opposite end of the tonearm pivot point is the headshell, where a cartridge will be mounted. All cartridges serve several functions – pick up the vibrations of a diamond stylus tracking through the grooves cut into an LP, convert those vibrations to an electrical signal, and pass the signal to a phono preamp (designed to boost the signal to what is called “line level”), then to a preamp, amp or integrated amp then to the speakers. All cartridges, whether the familiar Moving Magnet or Moving Coil type, use a series of magnets for the conversion of electrical signals. Protruding from the front of the body of the cartridge is a small, very thin tube called a cantilever. It provides a place where the stylus is mounted. In modern setups, the stylus is always diamond.
When we play an LP, the record is placed on the platter, AC power to the platter is applied, the platter speed set, the tonearm is lowered on the record, the stylus slides into the groove of the record, the diamond stylus tracks in the grooves and creates vibrations, the magnets in the cartridge convert those vibrations to an electrical signal, this signal is passed from the tonearm to the other various components in the signal chain, and we hear music. Sounds simple, right? Think again, we’re only getting warmed up.
What Happens Whan a Tonearm Tracks Across an LP?
Manufacturing an LP is a complex series of required steps, all with one goal in mind – to cut grooves in the vinyl surface of the album through which a diamond stylus will move. The stylus picks up the micro vibrations caused by the rotational movement of the platter and the angle of the tonearm in relation to this movement. These vibrations are then converted to an electrical circuit by the cartridge’s magnets, the signal is passed through the system, and music results. Generally speaking, bass grooves are wider than higher-frequency grooves to allow the low-frequency tones to develop. This is also the reason some LPs have longer playing time than others – the more bass, the wider the grooves, the less music on the album. If you have ever heard the term RIAA, these oversight recording techniques were standardized long ago to assure consistency. In terms of groove spacing, RIAA standards helped an LP last for up to about 22 minutes per side. Maybe longer.
Why a Tonearm and a Round LP Are So Complex
First understand tonearms must be very versatile. They need to convert vibrations to electrical signals, must move in a manner contradictory to the LP, and must allow for warped records, meaning up and down movement. A bearing in the tonearm allows for this vertical and horizontal movement. Most record lathes cut the groove in a record in a 90-degree right angle, essentially tangential to the surface. Because tonearms move in a circular fashion, the angle of the stylus is frequently at odds to the record surface. Generally speaking, these angles start out as slightly less than the ideal 90 degrees and will eventually correct itself to the proper alignment. But only very briefly. As the arc of the tonearm continues across the record, the angularity increases beyond 90 degrees and past the ideal angle. These compromises affect the sonic quality of how an LP sounds. And believe me, much research and expense has been invested to correct these anomalies – mostly with little success.
What About the Shape of Tonearms?
Tonearms come in several shapes. Some are straight, with the headshell angled. A very popular style is the familiar “S”-shaped tonearm on many of the products reviewed on FutureAudiophile.com. One some very expensive versions, there is even a tangential tonearm that tracks along the LP in the same orientation as the lathe cutting the master. All of these shapes are for a good reason. They are designed to reduce the tracking errors inherent in LP design. Tonearm length also varies. Currently, nine- and 10-inch-long tonearms are very popular. On more expensive versions, 12-inch tonearms are frequently used.
What Might Be Done to Reduce Tracking Errors?
In the late 1930s and early 1940s, two mathematicians worked out what are still today the preferred methods for tonearm alignment. Their goal was to correct tracking alignments based on the distance from the stylus to the pivot point. We know these measurements today as offset and overhang. Developed independently, E. Lofgren and H.G. Baerwald developed the current universal methods to set what is perhaps most important in tonearm setup. Much debate circles among the analog community about which works most effectively, and usually winds up as personal preference. Today, they are simply referred to as the Lofgren and Baerwald alignment methods. When setting the alignment, one of these two methods will most commonly be used.
A Brief Summary on How to Set Up an Audiophile Tonearm and Cartridge
Obviously, long before playing a record, it is first necessary to set up the cartridge and the tonearm. Doing so is widely considered one of, if not the single most, difficult tasks in all of high-performance audio. Properly setting up a turntable requires a series of steps most often performed in a specific order. Where the frustration comes in is, when one step has been completed, it is sometimes likely any of the previous steps have changed. This very often requires going back and changing something previously done, and sometimes starting all over again.
There are many articles and videos available on turntable/tonearm/cartridge setup, so I won’t be overly in depth here. Briefly, the following summarizes the steps on setting up the cartridge on your turntable. It should be understood that there are many setup procedures, so other methods may be slightly different.
- First, mount the cartridge to the headshell. Most headshells have slots to allow adjustment of the cartridge both forwards and backwards. These slots assist in setting the cartridge overhang.
- Connect the color-coded tonearm wires to their likewise colored pins on the back of the cartridge. This is best accomplished with a pair of tweezers. These pins are easily breakable, so be careful.
- Set the tracking weight, or Vertical Tracking Force (VTF), of the tonearm. This involves lowering the tonearm on a tracking force gauge and adjusting the counterbalance on the back of the tonearm. Keep adjusting the counterbalance until the tracking force on the gauge is in line with the cartridge manufacturer’s recommendations.
- Set the cartridge alignment. Here is where things get complicated. As the tonearm travels across the record, it is only perfectly tangent with the groove walls in the record at two points. Everywhere else across the arc of the tonearm as it moves along the record, the tangency is incorrect. This is a wildly complicated subject, with complex geometry and physics, and there is not enough space to delve intensely into the subject here. I will say are that the two critical factors are, first, setting the overhang, or the distance from the point where the cartridge touches the record to the pivot point; second is aligning the stylus to be sure it is straight and not horizontally canted one way or another. Principally, the main goal is to correctly set the cartridge in the headshell so that it is perfectly aligned in terms of distance to the pivot point and at a perfect 90 degree angle. This is where the Lofgren and Baerwald alignment methods come into focus. There are a wide range of commercially available protractors and free downloads of gauges used to ensure correct alignment.
- Next step is setting the stylus rake angle or SRA. This setting is also sometimes called the Vertical Tracking Angle or VTA. SRA is the angle of the diamond stylus to the record surface. Here, again, entire research papers have been published on this subject. Current wisdom is that the SRA should match the angle of the cutting head of the lathe used to make the LP master. This angle is most commonly 92 degrees. In order to ensure complete accuracy, most professional setup experts use a digital microscope attached to a laptop loaded with specialized software to dial everything in with complete accuracy. For those not in possession of digital microscopes and software, setting the SRA is best accomplished by adjusting the tonearm up and down until parallel with the record. This method may also require a listening test once setup has been completed. As is so often the case in audio, how things sound is the final arbiter.
- Next comes setting the azimuth. A correct azimuth setting ensures proper balance between the left and right channels. If the cartridge leans one way or another, vertically left or right, a channel imbalance will exist. Some tonearms, like any Unipivot tonearm design, make precise azimuth adjustment somewhat difficult. With several earlier tonearms, I used a meter called a Fozgometer and a test record for an accurate setting. Some turntables include a small thin rod that, when placed on top of the headshell, provides a visual alignment of azimuth. My current turntable has a gimbaled tonearm design, so setting the azimuth is basically already done. Incorrectly setting the azimuth will be instantly heard as the left to right channel balance will be audibly wrong.
- While not always a major factor, most turntables recommend next setting the antiskating. On some turntables, this is done with small weights on the very back of the tonearm. Other designs use a dial setting. Either way, antiskating ensures the tonearm does not suddenly go sliding across the record surface.
- Lastly, it is important at each step in the process to check the tracking force. Here is the bad news: perfecting each of the above steps can, and very often will, change the tracking force, requiring a recalibration. Equally frustrating, correctly enacting any of these steps means starting with a correct tracking force and, because each step can change the tracking force, well, suffice it to say, tonearm setup can be very aggravating. In the past, I’ve become so frustrated I had to walk away and try again later.
Of course, one might also hire a professional expert to set up a turntable. And if a new turntable/cartridge setup was purchased from a dealer, be sure setup is part of the purchase price. There may also be local companies that offer audiophile services, very often including turntable setup. Spending a few hundred dollars to use one of these businesses is very often well worth the cost. It has become increasingly popular for turntable manufacturers to sell a package deal with the turntable, cartridge and factory mounting as part of the purchase price. The MoFi MasterDeck Turntable (read the review) I reviewed offers this service.
The main takeaway is, in order to get the full enjoyment from an analog turntable, the deck, tonearm and cartridge must be set up correctly, or you will hear your mistakes with glaring immediacy.
Final Thoughts on Analog Turntables and Digital Music …
My personal journey in high-performance audio began long before the invention of digital. In my early years, LPs were all we had, so the format controversy didn’t yet exist. And to this day, I actually like both. There are days when a great LP sounds magnificent. However, digital is my main format, because of its ease, simplicity and sonic quality.
It cannot be overstated that, while digital music (specifically streaming) vastly outsells analog, many devoted audiophiles prefer the sound of an LP. They prefer the warmth, the immediacy of the contact of a stylus to a record. They love the practice of holding a record sleeve in their hands and reading the credits. They also do not mind the required task of flipping a record over when one side is finished.
For all those analog proponents, the cost of LPs, the cost of a turntable and cartridge and the high level of difficulty in setting up a tonearm and cartridge are all well worth the effort. Digital? Fine, but the sound of a great LP can be magical.
However any one individual audiophile prefers their music may be debatable, but it should known and understood the use of a turntable carries certain attributes not associated with digital playback. Which format is preferred is largely dependent on how much time, effort and money one wishes to devote to their choice. Analog can sound magnificent. Digital can sound magnificent. These are personal choices and best made because this is how you like your audio system to sound. So which one is best – digital or analog? There is no right or wrong here. The choice is yours alone, based on how you like to listen to music. Maybe this is the best part of the audio hobby, it’s your choice.
What is your experience with setting up turntables? How did you get your current analog rig sounding great? Did you do it yourself? Did you have some dealer or professional help? Let us know in the comments below. We love to hear from you.


A nice, for the most part even-handed, introduction to the format for those getting started.
My only squirm: the characterizing of those who find vinyl more to their liking because. . . “they prefer the warmth. . .”
Heck, I’ve listened to digital playback that was so doggone syrupy warm it resulted in me ordering waffles for dinner.
I’m not here to pick a fight or say one format is better than the other (even though, yes, I more often prefer vinyl and tape).
There is already too much division in this world, and probably not enough honoring of other’s likes/dislikes.
Just listen to music, damnit!
It’s good for the soul.
A good introduction to turntable set-up. Very helpful. Having grown up on vinyl it is still a very useful checklist for me. Thank you.
Personally, I prefer digital over vinyl from a convenience point of view. My chosen medium is CD (haha). Because I have CDs and a CD player and also, I don’t want to buy another piece of equipment.
There is another reason. I am not attracted to Streaming which is the impact on artists’ incomes. This, I think, has led to the need for a mortgage to go to a gig!
So, thanks for another excellent article. Keep them coming.
Many thanks Andy. Hope you found the piece interesting and worthwhile!
Happy Listening
Paul
I prefer (albeit, just a little) the sound of vinyl to digital, mainly because I find it to be fuller and deeper, with cleaner highs. The only sonically negative trade off, for me, is that I don’t think vinyl goes quite as low as digital. I also now only invest in 180 or 200 gram vinyl – for its superior sonics to more traditional, lighter-weight discs (and way less clicks and pops!). Cheers.
Thank you for a well written article! I intend to buy a turntable next year and have bookmarked this article in anticipation of helping to get it set up.
thanks for your feedback!
Thanks Doug! I wish you well in your turntable venture!!!
Paul