Audiophiles will debate all sorts of topics with enthusiast passion, but one thing that most of us agree on is that your listening room is the most important component of your system. Some audiophile systems are lucky enough to be installed in a dedicated environment. Some end up installed in the great room or the den. Some audiophile systems are fortunate to be installed in a finished basement. In rarified applications, some of the most elaborate audiophile systems are installed in their own building, separate and apart from the main living structure, and may even have their own electrical service, non-parallel walls, floated cement floors, mechanical rooms to isolate equipment, noise-free lighting controls and professionally designed acoustical treatments. This is more of a Powerball-winning situation, but worthy of audiophile daydreams. For most audiophiles, finding a way to best allow our (always increasingly) high-performance systems to thrive in their listening environments is the most expedient method of securing our investment and realizing the most enjoyment from our beloved hobby.
Our aim in this article is to look at the more popular aspects of how to marry, as it were, a home and an audio system, so that the system resides in a space where both will be happy in their relationship. We will consider the various home options and even how those spaces may be modified for ameliorating system sonics.
When Buying A Home, Consider Where the System Will Reside Before Making an Offer
When I show someone my audiophile listening room for the first time, I like to tell them “I bought a room and a house came with it.” My current home was initially chosen from the long list of other possibilities because I liked the listening room, at least from the picture on the real estate website. Technically, my audio room is the bonus room above the garage. But because my garage sits perpendicular to the main body of the house, and is a nicely-sized garage, using this space as my future audio room would work quite well. My real estate agent was also an audiophile and, when we first saw the house in person, we both remarked how close the room was to ideal in terms of build, dimensions and more.
All audio rooms, unless designed and built by professionals (and even then), will present challenges which must be overcome for ideal sonic excellence. Mine was no different. Even professionally designed spaces will face challenges that must be overcome. Knowing what the room gives will make system setup much easier in the long run.
Things To Consider In A Dedicated Audiophile Room
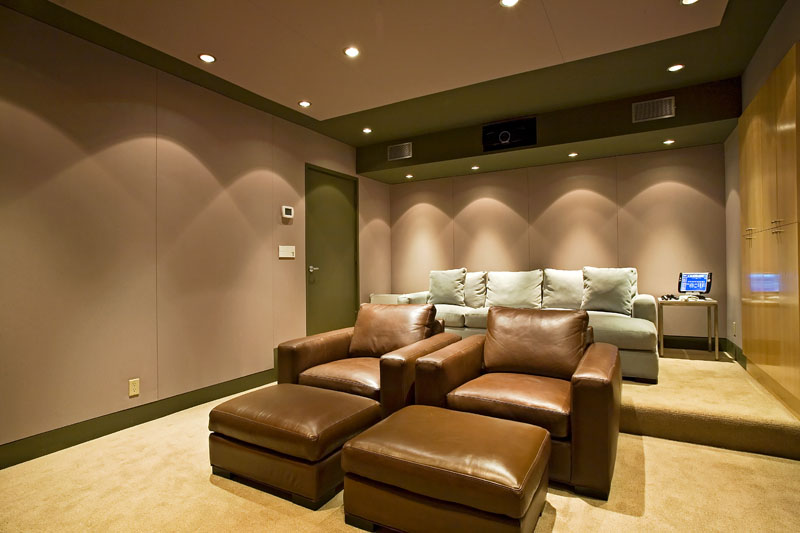
- Because “play the system, hear the room” is an inviolate and permanent part of our audiophile journey, always remember that the room matters. In fact, it matters quite a lot. Generally speaking, rectangular rooms are better for two-channel audio than square rooms. Square rooms with identical dimensions tend to promote standing waves and bass reflection problems. Bass is hard enough to tame without it getting stuck in a corner and developing a boomy sound.
- The less glass in a potential listening room, the better. Glass is a meaningful source of increased reflections, which almost always degrade sonics. For this reason alone, my audio room has no glass-framed artwork, no large television on the wall, no mirrors and, in fact, little to no glass of any kind. I do have three windows, but I keep the blinds closed all the time. My audio room is for one purpose: music playback. Nothing else. And yes, I realize not everyone will share this approach, and this is perfectly fine. Making our listening space our own is an important part of the hobby. Personalization of the listening space, therefore, is as important as component choices. There is nothing wrong with improving the overall listening experience by personalizing the room where the system will be housed.
- Generally speaking, carpeted floors are better than hard floor surfaces, although a mix of the two can be acceptable. Surfaces best avoided include hardwood, tile, marble, and even linoleum. Sound reflects off all surfaces and, if our goal is to minimize and control reflections, the floor matters just as much as the walls and ceiling. If a non-carpeted floor cannot be avoided, then the liberal use of area rugs, especially between the speakers and the listening position, is strongly recommended.
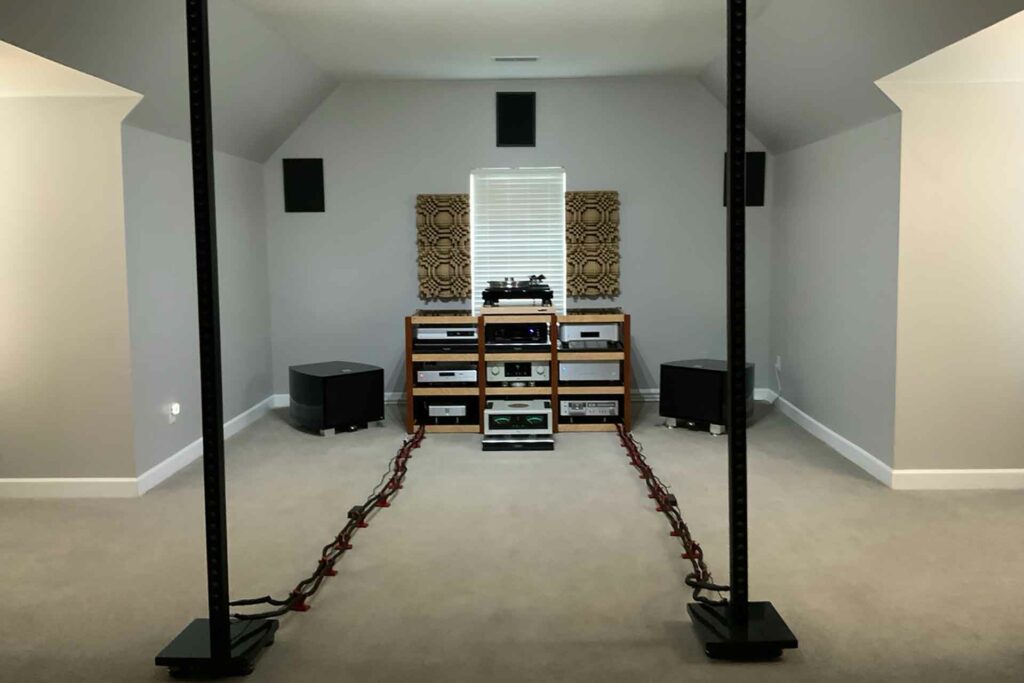
- Dimensionally, there are many options, but there are some guidelines when looking at a potential audiophile listening room. For a two-channel system, a rectangular room is always recommended. This creates the ideal possibility for a system to sound its best. Room dimensions are wildly variable. One popular rule of thumb, although certainly not the only one, is to maintain something close to a 1.6 to 1 ratio. In other words, if the room is 10 feet wide, then the room length should be around 16 feet. Ceiling height is best between eight to 12 feet, with nine or 10 being optimal. My audio room, for example, is 32 feet long and 17 feet wide. This yields a ratio of 1.88 to 1. Not perfect, but not bad, either. My nine-foot ceiling falls right in the comfort zone. Whatever your actual dimensions, considering the length, width and height of an audio room when looking at homes is paramount to creating quality sonics.
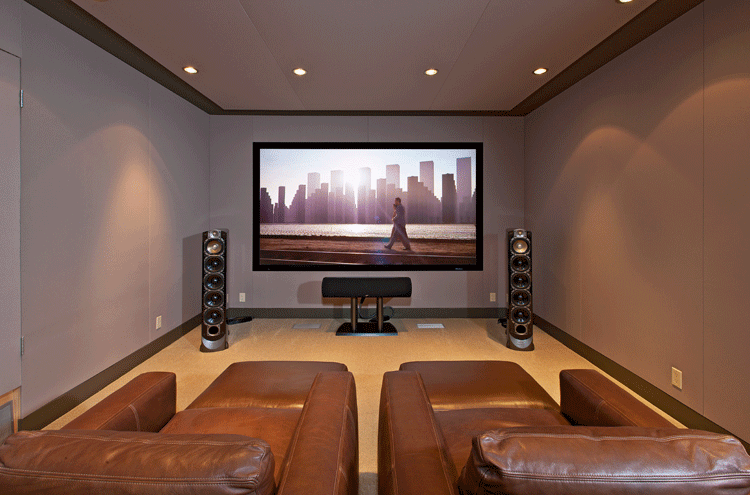
- It is normally advisable to place the speakers in a rectangular room on the short wall, not the long wall. The reason for this has to do with the manner in which sound is reflected. The goal is to minimize reflections, standing waves and muddy-sounding bass. Short wall placement helps with these goals. It also helps with the bass presentation and imaging. Remember, the overall goal is to properly manage the reflected sound in an enclosed space.
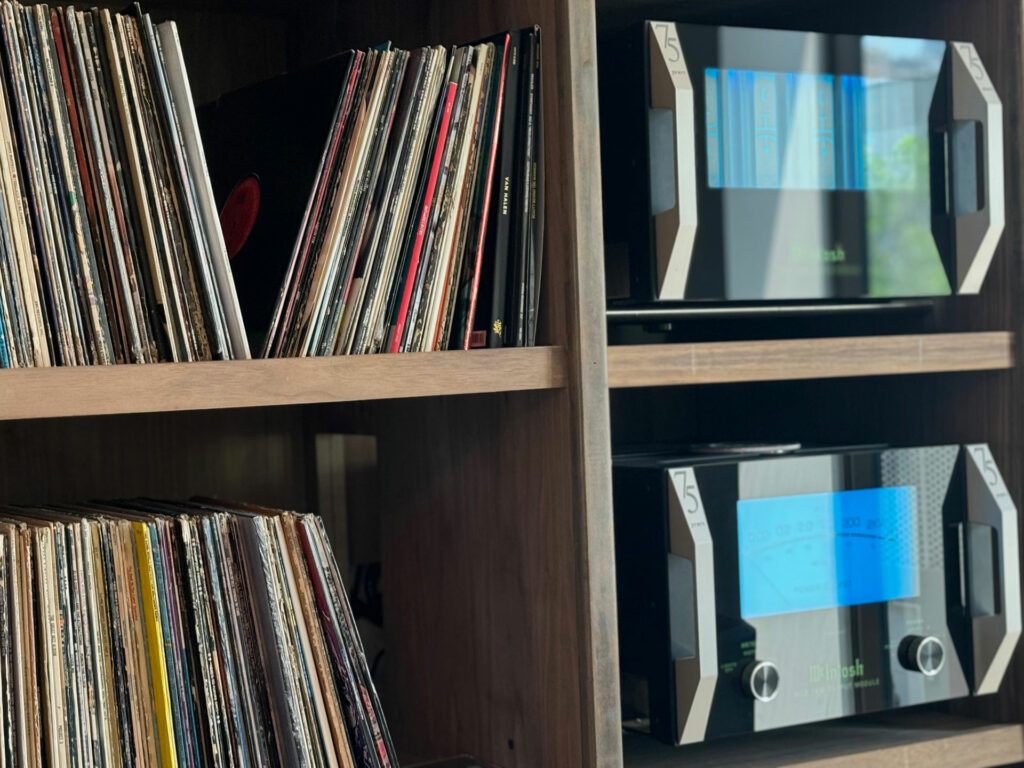
- Minimizing extra furniture is always a wise decision when looking at an room for its audiophile listening potential. Imaging simply cannot exist where furniture sits, so remove the chest of drawers and the bookshelves. However, many audiophiles rack, stack and pack their gear between their speakers, to the detriment of center imaging. There are those who will claim bookshelves stuffed with books are like an acoustical treatment (diffusion, to be specific). In actual practice, I find bookcases loaded with books offer little to no sonic improvement. They have almost zero absorption properties, necessary for mitigating reflections. At best, the unevenness of the books may provide a minimal measure of diffusion. Creating a meaningful absorption and reflection system in an audio room is best accomplished with actual acoustical panels. Lastly, regarding furniture, by all means, remove the coffee table between the speakers and the listening position. An Ottoman or coffee table creates a physical barrier in your first order reflections on the floor, which may ultimately negatively affect imaging. Coffee tables are even worse, because they often have hard or even glass surfaces, which are even more reflective. One of the least expensive audiophile upgrades that you will ever find is simply removing your coffee table from anywhere near your speakers or between you and your system.
- If possible, consider running one or maybe two dedicated 20-amp electrical circuits to the main panel box, so that the system’s power supply will not be shared. Using other “shared” circuits may introduce hum or other distortion-based issues into the audio signal. These typically originate from any device with a motor. Another surprising source of this type of distortion is a light dimmer. Dimmers, anywhere along the circuit, alter the voltage, and this disruption may send catastrophic distortions into the audio signal, negatively affecting the signal to noise ratio (SNR) and, worse, introducing an audible hum into the musical presentation. I was fortunate: my panel box is in the garage, directly below my audio room, so installing a dedicated line was pretty simple. Not sharing the electrical circuit with anything else in the home is a valued plus for an audio system.
Some More Tips on Setting Up a High-Performance Audiophile System
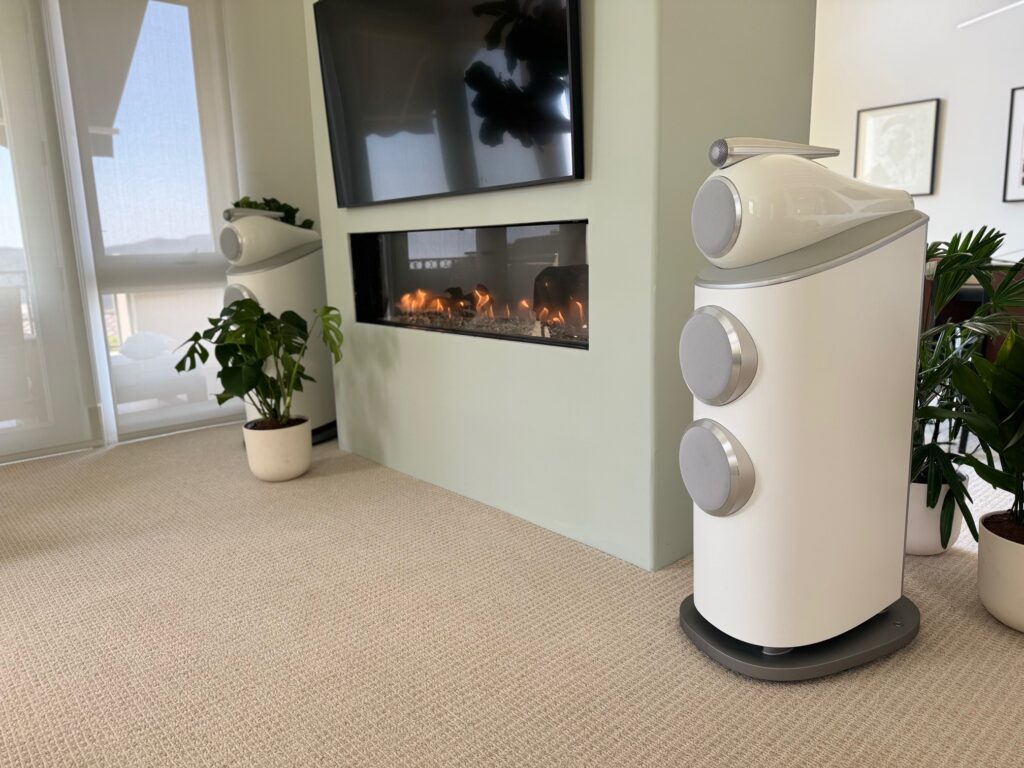
- I always find the best place to begin ,when looking at an audiophile listening environment, is with the loudspeakers. Knowing your speakers and how they operate is very important. Planar speakers (like Magnepans), are bi-directional, meaning that they project sound from the front and the back. This type of speaker tends to be directly radiating, meaning the imaging is seldom widespread. Off-axis imaging with planar speakers is difficult, but not impossible, to achieve. Dynamic speakers, which are far more common, are a little more forgiving in terms of room placement. However, they have issues worthy of consideration as well. Moving dynamic speakers close to the back wall increases bass response, but image depth often suffers. Moving dynamic speakers away from the wall helps with image depth, but bass can suffer. Be sure you understand your speakers and how they work in any type of room.
- Whenever possible, do not place the audio rack in between the speakers. We covered that this is just a lesson in physics that’s pretty easy to understand. If you want the center imaging that the mastering engineer heard coming from between your speakers, make sure there aren’t large components jammed between them. A side wall installation can help. Putting your gear in another room or a nearby closet is even better, but often logistically impossible. If the only place your gear can go is between your speakers, make sure that the gear is pushed back as far as reasonably possible, with the speakers out in front in order to preserve your center imaging.
- It is generally advised to use longer interconnects and shorter speaker cables. A common practice is to have one’s audiophile power amp, whether stereo or monoblocks, beside the speakers with shorter speaker cables. The longer of the cables should be the interconnect back to the audio rack, where the preamp or another component will be housed. It isn’t the end of the world if you cannot accommodate such an installation. Positioning an amplifier on the floor, instead of in a somewhat protected equipment rack, is very often a condition we must accept.
- Don’t forget the listening chair as an elemental part of your audiophile experience. Much like the tires on your performance car, this is one of the key ways in which you physically interact with your audiophile system. Being comfortable when listening to music is a great way to easily and affordably get more performance from your audiophile system. In a perfect world, you would buy furniture that allows you to have your “hot spot,” but also allows others to share the joy of listening to music with you. And always remember, dimensionally correct placement of the listening chair to the speakers is necessary for ideal imaging.
How Do Acoustical Room Treatments Factor Into Your Next Listening Room?
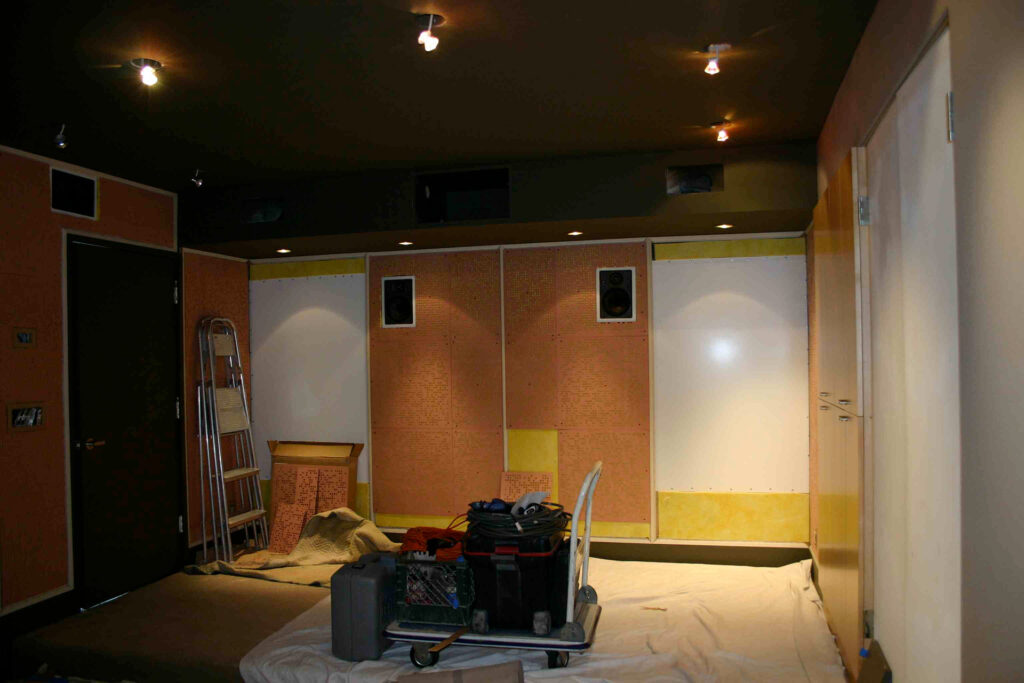
Room treatments come in many guises. There are a variety of panel construction options available. There are foam panels, which are usually molded into a specific shape. Many professional applications use wooden panels. There are versions made of an insulation material. Typically, this insulation is very heavy and thick. Rockwool and similar weight products are typically used. Avoid any panel using the standard pink fiberglass insulation. It offers little to no sonic advantage whatsoever. Although quite expensive, there are panels made from activated charcoal. These absorbative room treatments offer superior performance. There are panels for reflection, absorption and a combination of both. Best of all, they don’t have to break the bank, but considering how visually prominent these treatments are in your room, you can see where higher-end finishes and better build quality can be justifiable in a new audiophile listening room.
What absorption panels do is to capture the sonic energy in a room and convert it to heat, which is harmlessly dissipated. This process follows the Laws of Conversion of Energy and the Laws of Thermodynamics (learn more from the Kahn Academy). On a most basic level, this law states that energy cannot be created or destroyed, it can only be converted to a different form. However acoustical panels may be used, their unified goal is the same – to manage reflected sound. They work extremely well when properly applied. They also work very well with digital signal processing, or DSP. Utilizing both absorption and reflection panels represents an ideal room management approach for sonics. There are companies that will advise a recommended treatment procedure for a specific room. Usually, this service is provided at no charge, as long as the company receives an order for their products.
When Using Acoustical Panels, Don’t Go Too Crazy as You Can Overdo It …
When is too much of a good thing a bad thing? This is a question to be asked when applying acoustical panels in an audio room. Generally speaking, a good rule of thumb to follow when considering acoustical panels is that less is more. Be careful to not over-dampen the room. I know from experience, as I once had so many panels on the walls and ceiling that the sound was so muffled, it sounded as if someone was speaking into a thick bath towel. I have since corrected my mistake and have removed over half of the panels I originally installed. Working with a company specializing in the manufacture, use and placement of acoustical panels is a wise choice.
Knowing and Understanding the Audiophile Room is Vitally Important
Understanding the room that houses an audio system is a great start in getting to an excellent sonic outcome in your next room configuration. In a rectangular room, measure the distance from one of the long walls to the other. Take this measurement in three or four places along the wall. The goal is to identify if the walls are parallel or not. Most often, the walls will not be parallel. Mine were bad enough that it meant moving the right speaker back about two inches to make the center image actually appear in the center. Use a four-foot level to determine if the walls are plumb. In my room, in the area of image development, one wall was perfectly plumb, but the opposite wall was canted forward a few degrees. Plan on the fact that builders do not build rooms or houses with audio systems in mind.
Because the goal with acoustical panels is managing reflected sound, generally speaking, when two signals reflect off a side wall, and the reflection is under about eight feet, most will hear this reflected sound as one signal. This time delay, although subtle, tells the brain there is greater distance, so the image expands. This helps to create a life-sized image presentation. For this reason, it is usually best to not damp the short wall. However, damping the long wall allows our brain to perceive reflections as two separate signals. This is another reason why rectangular rooms are preferable for a two-channel audio system, as opposed to a square room.
What if a Potential New Residence Has A Common Wall?
Any residence with a common wall, such as an apartment, condo or townhouse, presents a significant challenge. Low frequency loves and very easily travels through common walls, with little to no physical or sonic opposition. One somewhat fancy option is to decouple the sheetrock from the wall studs on the common wall. This includes using steel hat channel, two layers of sheet rock, a product called Green Glue and an acoustical sealant. Rental properties, such as apartments, are a significant challenge, because most landlords will not allow construction projects by a tenant. For renters, or those who can’t easily start tearing a room down to the studs, you might have to exclude some potentially quality listening room options, in that you will have your local HOA all over you when they get a hint of how low your REL or SVS subwoofer can go. Even you would have to complain if you routinely heard residual low-frequency sounds through the drywall from an adjacent residence.
Another possible physical solution is building a wall within a wall. This means having a standard wall with studs and sheetrock and, a few inches away, building a second wall with studs and sheetrock. You will lose about six inches of space, but it also makes sound transmission much more difficult. Remember, adding mass is the most expedient way to minimize sound from moving beyond the audio room itself. In fact, and probably going to the extreme, consider buying a brick home, as opposed to one with wood siding, because the brick adds mass. And mass is an absolute requirement in preventing your home from acting like an enormous tuning fork and allowing low-frequency sound to bother the neighbors.
For more detailed information on room acoustics (read it here), see this article previously published on Future Audiophile on the subject.
Final Thoughts on Making the Home Work For an Audiophile System …
I realize some of the concepts in this article are somewhat far-reaching. I see this as a determination of the level of interest anyone may have in the audiophile hobby. For those who simply want a nice-sounding system the family can enjoy, I suspect much of this will matter very little. For those, like myself, who are chasing the nth degree of sonic perfection, the room where the system resides will be as important a choice as the system itself. When buying my home, I looked at, and dismissed from consideration, hundreds of otherwise perfectly nice homes that I felt lacked a proper space for my audio system.
All audiophiles must follow a logical path when it comes to installing an audiophile system. Are there world-class audiophile systems installed in spaces not necessarily suited to a system of such elite status? Of course there are. Our publisher, Jerry Del Colliano, just wrote about his “Imperfect Audiophile Room.” My guess is that the owners of these enjoy an “imperfect room” all the same. For those who are currently purchasing, or are planning to buy a new home in the immediate future, if your aspirations include a dedicated audio room, be sure you understand what constitutes a proper room. Talk to dealers and other audio professionals on what to look for and what to avoid. Do some research on the Internet to become a more informed buyer. You would hardly buy a new amp or a set of speakers without doing some beforehand research. Why, then, would you treat your home and the space for your system any differently?
Tell us about how your system ended up being installed where it is today. How much consideration went into audio when it came to buying/renting your residence? Let us know your experience here in our moderated comments and we will get them posted right away. We love to hear from you.


Specialised Rooms: one client I knew some years ago had his listening room built underground, in a bunker in his back garden.
Like you whenever we looked at a house to buy my eye was watching for where would my system go. If there wasn’t a place I was satisfied with it went off the list and the search went on. The house we have my listening room is in a finished lower level. My wife was quite happy to have me and the system out of the way and I have a spot that is very good.
I’m leery of fixed acoustic treatments & in-wall speakers because of how they effect house resale. If you’re hearing impaired but still enjoy music, try speaker placements that favor your good or better ear rather than equilateral triangle. If you don’t have room correction software I’m afraid it’s down to experiment, experiment, experiment.