So there you are, all primed and ready for a true audiophile experience with your bad-to-the-bone stereo system – the one you’ve spent months/years/decades researching, curating, purchasing, and setting up. You select the music, press play, and wow, doesn’t it sound great? You’re so magnetized to the experience you decide to crank up the volume to concert levels. About five minutes later, your neighbor, with whom you share a common wall, is ringing your doorbell asking you to turn that thing down because he or she cannot hear their TV or is trying to sleep.
It has happened to me and it can happen to you, either with neighbors or the people you share a home with. The simple truth is that sound, especially low-frequency bass, moves easily through traditional walls. What’s an audiophile to do? Soundproofing is one option.
In nearly all cases, almost no soundproofing method used in a scenario where two home residences share a common wall will be 100-percent effective but it can make drastic improvements. Understand first that sheetrock, screws, and wall studs act as a veritable interstate highway to transmit sound, most commonly low frequency sound, from one wall to and through another. In most cases, low frequencies easily cross wall boundaries because of an inherently long wavelength. With that said, there is a lot you can do to drastically improve the sound inside of your listening room while isolating sound from the rest of your home and/or shared walls.
What Are the Basics Audiophile Sound Isolation Issues at Hand?
- Sound Transmission Class (or STC) is a national rating defining the level of how much sound is transmitted through a wall. A 2×4 stud wall with standard pink fiberglass insulation has an STC rating of something between 30 and 40. Pretty much anything below an STC 50, expect your doorbell to be ringing very soon. It is not until you reach and possibly exceed STC 60 that any measurable noise abatement will be realized. And going from STC 30 to STC 60, or higher, is difficult and, in many case, quite expensive.
- Condos, townhouses, and especially apartments are not built with any measurable attention to stopping bass produced by high performance audio or home theater systems.About the only consideration is stopping loud speech. In fact, many such residences may only barely meet the lowest threshold for averting noise transmission. This is not something building inspectors routinely check. In fact, they probably never do.
- Listening to a stereo at reasonably loud 85 dB or watching a movie with guns blazing and cannons exploding all around the room will almost certainly, and consistently, catch the attention of your neighbor. Worse still, most common walls are not designed to prevent this from happening.
How Do We Get Started Dealing with Audiophile-Grade Noise Isolation?
- Be sure and check your local building code to find out local guidelines. Also check the regulations in your city. In my hometown of Charlotte, it’s illegal for anything I’m doing to cause audible noise of 50 dB or greater in my common-wall neighbor’s home. That’s not very high at all. In fact, it is about the SPL level of normal speech. Knowing the rules before starting any project is highly advised.
- Construction prices of about $10 to $50 per square foot are not out of line, depending on the area of the country. A 10-foot-by-12-foot wall may therefore range in price from $1,500 to $4,000 or more to treat, again, depending on the area of the country and the complexity of the wall. It is also very common to not do anything to floors and ceilings. Most people don’t want to tear down their home chasing this particular dragon, but there are big audio performance and isolation gains to be had if you are willing to go to the next level.
- Adding mass to the common wall is a worthwhile first step, because additional mass makes it much more difficult for low frequencies to vibrate and ultimately move through wall surfaces. Think about how firmly grasping a vibrating tuning fork immediately stops the sound it is making.
- Creating an air gap between walls is also very effective. While sound moves easily through sheetrock and studs, it has a much more difficult time with air. One common solution is a wall within a wall, or two 2×4 stud walls, with sheetrock on both sides of each wall and an air gap in between. This helps stop soundwaves from passing through to your neighbor’s home.
A Step-by-Step Guide to Basic Audiophile Sound Abatement
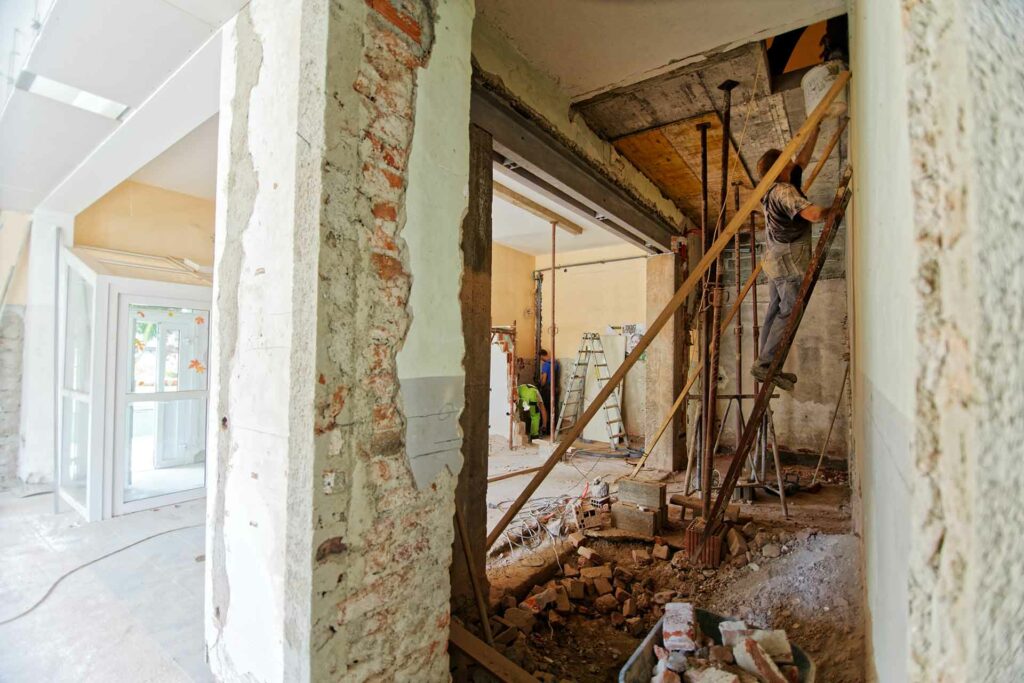
- First, plan on making a really spectacular mess. Be sure to plastic over floors, furniture and doorways. Cover HVAC registers so dust won’t fill the ducts, which will then require a professional cleaning. Open windows if the weather permits. Move all electronics out of the room so they will not collect the dust you are going to create.
- Remove the sheetrock on the entire common wall, exposing the wall studs. If you see a wall of pink insulation, which you probably will, remove it as well.
- Remove any sheetrock screws or nails left in the studs.
- Install sound isolation clips on the studs. There are numerous brands of these products available. This is an example just one of them. Follow the manufacturers recommendations for how many, spacing, etc. There will be lots.
- Install Steel Hat Channels on the sound isolation clips. Once again, there are abundant options, and one is listed here. Hat channels mounted on isolation clips serve to decouple the sheetrock from the studs, making it much more difficult to transmit sound through the wall.
- Extend electrical boxes. In the end, you will be using two layers of 5/8-inch sheetrock mounted on a steel hat channel mounted on metal clips attached to studs. You will be losing about three inches of room dimensions once done. Existing electrical boxes mounted on studs will not work because the box will be too far back in the wall. One option is to replace plastic boxes with extra deep metal boxes that allow the box to sit flush with the finished wall. Once again, a wide variety of brands for these products is available.
- Install an insulation puddy pad around the electrical box. Remember. no detail too small as they all add up to the wonderful outcome that is pending.
- Next, add an insulation product designed for reducing the transmission of sound. One such product, Rockwool, is available at most any retail builder’s supply center. Another product is Quiet Batt 30 insulation material. Also designed for soundproofing, it is available from a variety of sources at retail and online. In fact, there are various brands of insulation designed for this purpose. A little homework will yield several different viable options.
- After insulation of the sound insulation parts and in-wall materials, install one layer of 5/8-inch sheetrock. Be absolutely sure the sheetrock screws are fastened to the steel channel and not the studs.
- Next, apply Green Glue to the back of a second layer of 5/8-inch sheetrock. About one tube per 5×8-foot piece of sheetrock is recommended. Mount the second layer of sheetrock, again being sure the screws go into the hat channel. Also, be sure the inner sheetrock joints do not line up with the outer ones. Once installed, the Green Glue will compress and spread out to form a barrier, increasing the kinetic energy of the soundwave when it passes, subsequently converting much of that energy to heat, which is harmlessly dissipated.
- Tape and apply sheetrock mud to the joints. When the wall prep has been completed, sand and paint the wall to your tastes. Hopefully, you will be able to play your system loudly, within reason, without bothering your neighbors. Remember, however, virtually no solution is absolutely perfect.
What About Audiophile Noise Treatments in Other Rooms in the House?
- If your system is in a basement, you can apply Rockwool to the basement ceiling joists. You can build a framed room, and even a wall within a wall, and use the method listed above.
- It also helps if the listening space is far away from wherever the family gathers. In my home, the audio room is at the complete opposite side of the house from the den. I can play music all day and someone watching TV will likely not hear anything.
What If You are an Audiophile Who Lives in an Apartment and/or Can’t Damage Walls?
- Because walls cannot be torn down, apartment living presents a real challenge to abating noise. While the options are more limited, there are some things you can do.
- Decouple your speakers from the floor. Think of this as a first line of defense. There are any number of options to accomplish this. A second option offering azimuth adjustment. It should be understood that using one of these products may alter the sonics of your audio system and may require repositioning your speakers.
- If subs are the problem (or part of the problem), move them a little farther into the room,closer to the listening position and away from the common wall. This will allow turning down the volume of the subs, which will lessen the low-frequency transmission overall. Once again, this may alter the sonics, but improving your neighborly politics is always a good compromise in these imperfect living/listening situations.
- Use wall-mounted absorption panels and corner-mounted bass traps. The idea is to stop low frequencies from vibrating and moving through the wall. Absorption panels and bass traps catch low frequency wavelengths and increase the kinetic energy of the soundwave in motion, converting it to heat that is dissipated. An Internet search will yield a wide variety of options for these types of panels, yet a very popular one is GIK Acoustics. They offer a host of solutions like the 244 Bass Trap and the Tri Trap Corner Bass Traps.
- Making your own wall treatments is a popular DIY project, and if you have some basic woodworking skills, you can very affordably make your own. Using a product like the Rockwool insulation listed above in a wooden frame covered by a thin cotton fabric is one possibility.
- Apply Mass Loaded Vinyl (MLV) to the wall. Ideally, MLV should be applied directly to the studs and is actually an optional, and possibly equally effective, alternative to using isolation clips, hat channels, Green Glue, and two layers of sheetrock. For an apartment setting, MLV can be hung on the existing common wall and then covered with curtains, bookshelves, or other similar decorations. There are many companies making this type of product so availability should be easy.
- If possible, relocate the listening room to one that does not share a common wall. This is the most obvious solution, but in most apartments and condos, you don’t always have such logistical flexibility.
Final Thoughts on Acoustical Isolation for Audiophiles
Stopping bass from moving through a common wall is very difficult. It can also be expensive, cause significant disruption, and even though it may help considerably, it will likely not be 100-percent effective. Apartments, where walls cannot be torn down, present a significant challenge. Headphones are a popular choice. And of course, there is the foolproof method of turning down the volume until it doesn’t bother anyone. Yeah, that sort of sucks and defeats the purpose of the audiophile hobby, but it can solve your political problems with your neighbors. Keeping your listening sessions from going much past 9 PM is another good, real-world solution that can keep the peace.
My former residence was a townhouse and I suffered through bothering my neighbor. I hired a company, at a cost of about $3,000, to renovate my common wall using the isolation clip and hat channel method. I put my speakers, at the time KEF Blades, on Symposium Super Plus platforms along with Iso Acoustic Gaia 1 footers. Even doing all this didn’t completely solve the problem, because I didn’t address the ceiling and the floors. I wasn’t prepared to demolish my entire downstairs to correct this issue. I did want to be a good neighbor, so my final effort was reducing the amplitude by about 20dB so she wouldn’t be bothered.
I did eventually find a permanent solution, however. I bought a large brick home and moved. Problem solved, albeit at a pretty extreme cost.


Great article, however details are everything. That entire project is a fail unless the sheetrock has a 1/8-1/4″ gap on all four sides sealed with acoustical caulk, NOT mud. This creates a wall-size mass-loaded floating diaphragmatic absorber.
The easier, less expensive, and much less messy version, is to mount the hat channel and clips directly to the existing wall, then mount the 2-layers of drywall (I prefer to mix 1/2″ and 5/8″ as each absorbs different frequencies.) remembering the gap and caulk all around. This gives 3 layers of mass loading (sheetrock), totalling 1 5/8″ both decoupled and constrained vs. 1 1/4″. That’s 30% more mass.
While acoustical panels are an excellent and highly recommended solution for in-room absorption, they have virtually zero impact on sound transmission, especially in the bass region.
Floating the speakers, especially the subwoofers is nearly mandatory. The low-cost solution of a open bottom wood plinth sitting on a small inner tube, making sure the plinth doesn’t touch the floor, is just as effective as the more expensive commercial platforms. So are 2″ 50 Durometer sorbathane hemisphere feet available online for under $50 a set.
Tower and stand-mount speakers can use smaller diameter 1, 1.25, or 1.5″ feet and either 50 or slightly stiffer 70 Durometer. As an aside, sorbathane feet can be very effective for turntable isolation, as well.
In my own homes I always specify staggered studs (2X4 staggered in and outside 16″ OC) stuffed with rockwool for all shared walls. This alone makes a very noticeable reduction in noise, especially if the wall is shared wit a bathroom.
I also spec solid core doors, and sweeps on the bottom where that would help. Open a hollow core door and you’ll find a perimeter of 2X2, maybe a cross piece, and a honeycomb of corrugated cardboard as filler, covered with 1/8″ hardboard skins. Acoustically useless.
Thanks again for shining some light on this topic.
Richard Johnson