By any measure, audiophiles are predominantly concerned about any number of specifics. We endlessly evaluate our systems down to the most intricate of details in the hope, perhaps even the expectation, of improved sonics. We pursue component selection with the utmost level of dedication. We read audiophile equipment reviews, talk to manufacturers, dealers, and even fellow audiophiles in our quest for an audio system with the main goal of simple enjoyment. This part of the hobby is pretty much sacrosanct.
To aid us in our journey, and in order to connect all parts of our systems and maintain our gear, we need a variety of tools on hand. The variety and assortment of these tools may be surprisingly widespread. Based on the country of manufacture, some components might have fasteners in U.S. imperial or metric dimensions. Obviously, these fasteners each require different tools. We need to measure things, be sure things are level and straight, we need to tighten and loosen things, we need to have a means to mark where things go, and a whole host of other tasks that come up from time to time in our audiophile listening spaces.
Over the years, I have been buying tools to leave in my upstairs audio room. This saves me the effort of having to go down to the garage to get what I need. I became quite tired of needing a tool only to realize it was downstairs in the garage and I wasn’t. Or, worse yet, discovering I didn’t have what I needed and then be forced to buy what I should really have had in the first place. Having tools in the same room in which my system is housed makes those spur of the moment jobs much easier and more expedient.
In this article, we will examine some of the tools that may be used in the furtherance of the hobby. In fact, all of these tools I have and use myself. These tools are only recommendations based on my own findings. While they are available in a whole host of places, I found Amazon to be a source for virtually everything I wanted. Of course, almost everything listed is available at the local hardware store, Lowes or Home Depot. Many of these tools are fairly inexpensive and, in all probability, may even be found lying around the house.
What Are Some Suggested Hand Tools That Are Good for Audiophiles?
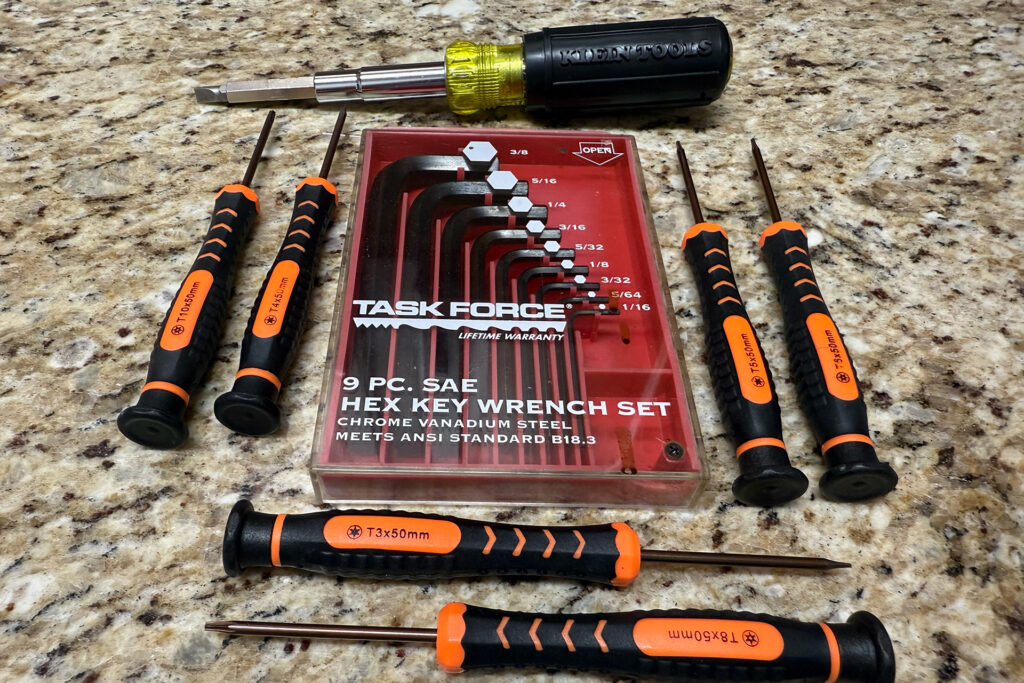
- Probably the most ubiquitous hand tool on Earth is the humble screwdriver. I have a dozen or more in my tool cabinets in the garage, but for my audio room, I wanted one to basically do it all. I currently use the Klein Multi Use Screwdriver (buy at Amazon $14.95). Multiple screwdriver bits, including regular and Phillips-head, Torx, and even a couple of nut drivers are included. Simply choose the tip you need for the application, insert it into the tool, and you are ready to go.
- Following closely behind the screwdriver is a good set of Allen wrenches (buy at Amazon – $17.06) . It is also wise to have them in U.S. imperial, as well as in metric sizes. I like the small versions with a comfortable handle and a straight shaft. However, I also have an L-shaped set for hard-to-reach fasteners. Some turntables may have an Allen screw, which must be loosened to change the tonearm height. In order to set the VTA, on many tables it is necessary to loosen the Allen screw, raise or lower the tonearm, then retighten the screw. Not surprisingly, most European tables use metric sizes, while most U.S. tables use imperial sizes.
- While not widely used, I find it occasionally helpful to have a set of Torx screwdrivers on hand (buy at Amazon, $9.99). Admittedly, these are seldom used but, surprisingly, every so often I need one and, for 10 bucks, it is better to be Boy Scouts prepared. I like the smaller handheld tools with the rotating knurl on the top of the handle. This makes one-handed operation a snap. Very useful when you are trying to hold a tool in one hand and something else in the other.
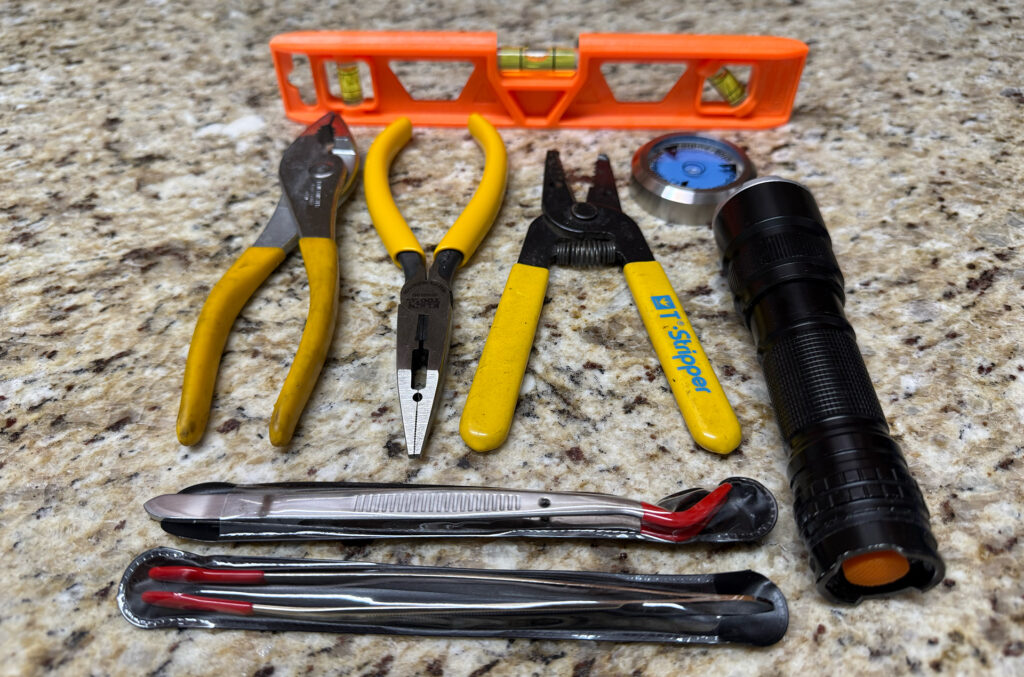
- Likewise, a small LED flashlight is an absolute requirement (buy a Maglite at Amazon for $28.75). I prefer the small handheld version with a really bright light. Peering around the back of an audio rack is much easier when the flashlight fits in the palm of your hand and you can actually see what you are doing. Tracing where wires and cables go is hard enough on its own – the job is even more difficult in the dark confines of the interior of an audio rack.
- I find a surprising amount of use in a good pair of high quality scissors (buy at Amazon – $9.42). There are more brands than I could ever mention, but I long ago standardized the exclusive use of Fiskars scissors. They cut extremely well and stay sharp for what seems like forever.
- It is always a good idea to have several types of pliers on hand. I find almost all of my needs are met by a nice set of needle nosed pliers (buy at Amazon for $24.89) and I prefer the type which can also cut small gauged wire. This tool is especially useful for a wide variety of applications. While a set of Channel Lock pliers is probably overkill, a small, inexpensive set of slip joint pliers (buy at Amazon for $7.59) may be very helpful in gently loosening anything beyond finger tight.
- A high-quality wire stripper is almost a must-have (buy at Amazon, $20.32). Since the 1970s, I have been using an Ideal T5 wire stripper. However, this is sized for wire gauges that are probably for wires in excess of those most of us will ever run across in audio applications. I suggest a wire stripper that will accommodate wire sizes down to18-gauge solid wire, and 20-gauge stranded wire. In the Ideal world, this is the 45-120 (Buy at Amazon for $17.39) model. As expected, there are a wide variety of excellent wire strippers available.
- I suggest having a good set of tweezers (Amazon, $19.95). Most often, this particular tool will commonly be used in mounting a cartridge to a headshell, but not always. I have two. The first is a six-inch-long straight pair and the second is a six-inch-long pair with a curved end. Depending on the cartridge, having both is very helpful, and makes mounting the cartridge, itself a difficult task, much easier.
What Are Some Suggested Tools for Speaker Positioning?
- First and foremost, a world-class tape measure (in this case with a laser included) is a requirement (buy at Amazon for $59.99, with many suitable lesser-priced ones without the laser). I prefer the type that, when extended, the tape does not retract. In order to roll up the tape, a button must be pushed. I also prefer a tape with both imperial and metric markings. In elementary school, I hated adding fractions, and I still despise doing so. I find it much easier to add two millimeters to six millimeters than adding two-thirds and three-sixteenths . Adding a laser is just being fancy, but when have any of us audiophiles ever been accused of not being a little fancy?
- While a steel tape rule is very handy, I find I really prefer a digital measuring device. I use one made by Bosch (Buy at Amazon for $46.78). When I bought mine, I paid about a $100 but today, the above version is a great buy at just under $50.00. Make sure the device will measure in both imperial and metric. Also make sure a red dot is projected. Being able to see this dot on a wall or on the speaker itself helps assure measurement accuracy.
- I also find a Bosch Laser Level a very useful tool in speaker positioning (buy at Amazon for $70.36). I use an older Bosch model that costs about $70, but there are more upmarket ones, too. Using the term laser level is a bit misleading. What I like are the red laser lines in both the vertical and horizontal planes. I use this tool quite often. For instance, I can use it to check the orientation of a speaker relative to the wall. I can use the red laser line as a reference in marking speaker placement. I use it to position acoustical panels on the wall and ceiling. I even use mine to check the position of the listening chair. As much as a screwdriver is a must-have tool, I find the laser level a very close second.
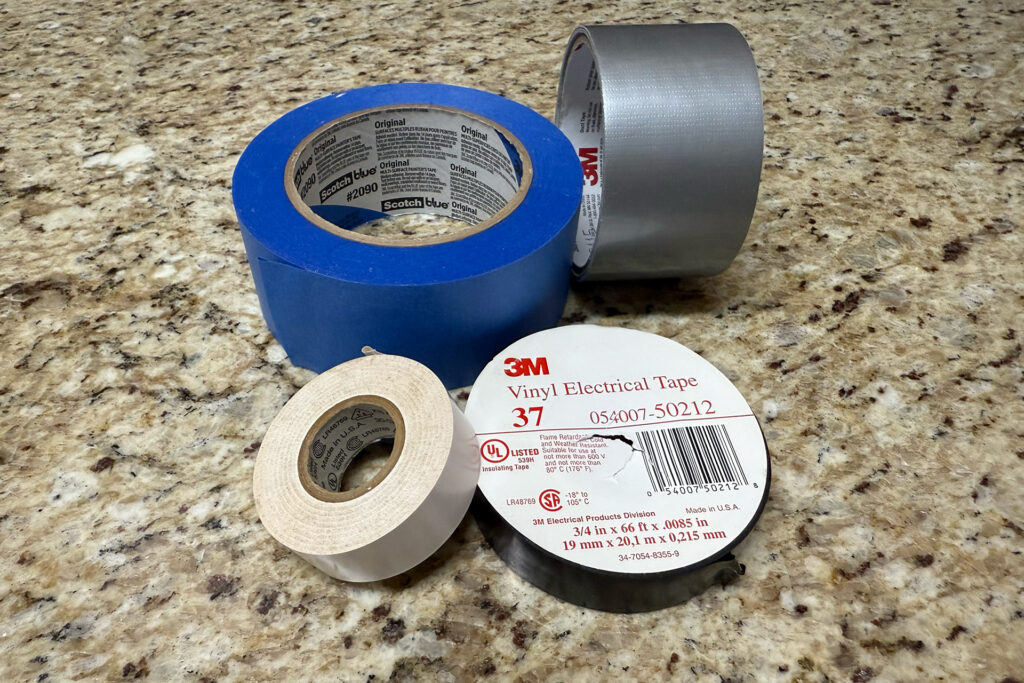
- I would highly suggest having a good roll of duct tape (buy at Amazon for $5.98). When establishing or verifying the distance of any two points based on floor measurements, duct tape works like a champ. I find it especially useful for assisting in speaker setup. It adheres very well to carpet and can be marked with a Sharpie or a pen. Just as in life, a good roll of duct tape has a surprising number of uses in our audio rooms. It is not advisable to put duct tape on a painted wall. The adhesive side is far too sticky and may damage the paint.
- Also suggested is a two inch wide roll of painters tape (buy at Amazon $8.99). I use this to mark the wall where I want to hang something. In fact, I use painter’s tape for a wide variety of applications. While blue painter’s tape is perfect for a painted wall, it doesn’t stick very well to carpet.
- A roll of black and white electrical tape is highly recommended (Buy at Amazon for $10.99).Very often, the markings on cable terminals are not easily identified by positive and negative – especially behind or inside an audio rack. Putting a piece of white electrical tape on both ends of the negative wire removes all doubt. Black electrical tape may be used virtually anywhere tape is required.
- Having a couple of different types of levels is another must have. Most audiophiles use a small, round bubble level (buy at Amazon for $5.55) to aid in setting up a turntable. But I also like a spirit level (buy at Amazon for $6.99) to ensure my speakers are either horizontally straight or if set up this way, slightly canted back. I also have used a level, in this case a four-foot level, to check the walls to see if they were plumb. The results were surprising – very often, they weren’t.
Other Helpful Tools You Might Use in Your Audio Room
- I find almost endless uses of a good set of inflatable air bladders (buy at Amazon for $7.73. I have four of them and use them in a variety of applications. For instance, I use them to lift heavy amps to place footers underneath. I use them to raise turntables to adjust the feet on the bottom for leveling. When I received the E. A. T. Fortissimo turntable for review (read review here), the platter weighed 49 pounds. Trying to hold this heavy platter out in front of my body, then lean over to align the platter and the shaft, proved to be nearly impossible. I used my air bladders to hold the platter above the shaft. This allowed me to visually confirm that the platter was correctly positioned over the shaft. I moved the platter into position and slowly released a small amount of air inside the bladders. When I was sure the platter was going down over the shaft, I released the air in all four bladders, and the platter very gently slid into position. This ensured I didn’t damage anything and relieved me of trying to precisely position a 49-pound platter over a shaft I could barely see.
- I recommend having some sort of label marking system. I use the Brother P-Touch (buy at Amazon $154.99). Some cables and interconnects, especially single-ended types, work best when attached in the same direction. It is also a widely desired practice to use the same cable on the same device. If a number of cables have been removed, especially single-ended cables, it is very easy to have little to no clue which cable went where, or which end was attached to what. Being able to mark the cables completely solves this confusion. There are many different types of label makers. I mention the Brother P-Touch only because I have used it and found it to work very well.
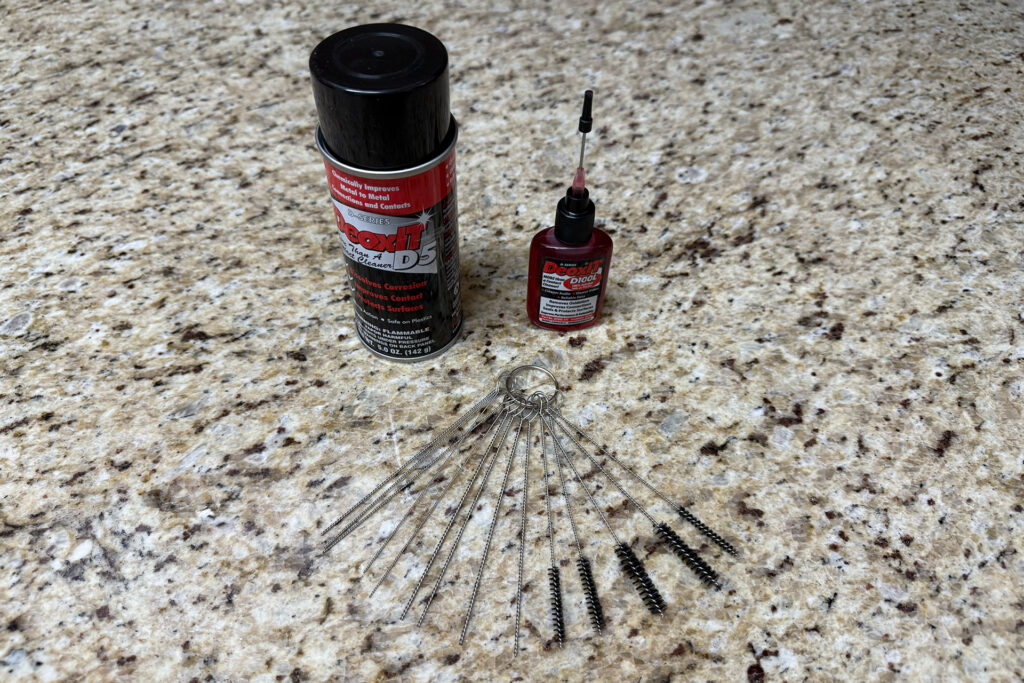
- It is a wise decision to have some Deoxit close by (buy at Amazon, $17.99). I have both a spray can and a dispenser with the long needle-type applicator. I use the spray can when cleaning male plugs, particularly AC power cords. I use the needle-type applicator to put Deoxit into the female ends of XLR cables. It cannot be stated often enough how much of an unbelievable sonic improvement might be had by simply cleaning the corrosion off the terminals in your system on a yearly basis.
- When cleaning the female ends of XLR cables, a set of carburetor cleaning brushes works wonders ($8.99 – buy at Amazon). These thin, small brushes are capable of scrubbing out the inside of the pins on the female end of an XLR cable.
- I cannot overstate the joy of using a really great set of magnifying glasses (buy at Amazon for $20.39). As I have gotten older, reading glasses have become a necessary part of my life. Doing closeup work on anything audio is easier when I can actually see what I am doing. I have a pair with work lights and six lenses of various levels of magnification. I believe I paid about $25 for the pair I have, and they are an indispensable part of my audio tools.
Final Thoughts on Outfitting Yourself with Tools for Your Audiophile System …
I collected these tools, and other related goodies, over many years. I would find a need for some sort of tool, so I just bought what I needed. Once purchased, they were consigned to my audio room closet. Are all of these tools necessary? Of course not. They are often helpful, however. I didn’t mention the assortment of small brackets and mounting hardware I have in my closet. Nor did I discuss the wire and extension cords cluttering up my closet. I didn’t speak to the variety of connectors, lugs, and similar parts I have lying around. I also have a growing collection of spade, banana, and RCA lugs I bought for some reason and, for the most part, never used.
My goal in this article was to take a look at a side of the hobby most of us seldom even consider. We hardly ever think of having some infrequently used tool until we have a need for one. We then cannot get one fast enough. Having a full assortment of these and more tools and devices to aid your audiophile experience is a convenient path to follow. It may make little difference in your system’s actual sonics, but being able to easily and effortlessly accomplish a particular task by use of a tool will get you back to what you would rather be doing in the first place – listening to music.
What did I miss? What tools do you use? What are good items to have hanging out just in case you need them? Share with us your favorite tools and we will post your comments ASAP.


This is a great list, Paul! For years I’ve used an LED flashlight, and lately I’ve been using a headlamp instead, to leave both hands free while hooking things up.
The one I’ve used is this: https://www.amazon.com/dp/B0DN646XM3
but many similar ones are available. Try it; I think you’ll appreciate the improvement over an ordinary flashlight.
Thanks Mike! I appreciate the compliment!
The headlamp would have been a very worthy inclusion. Thanks for pointing this one out as it should easily be part of an audiophile tool kit.
Be well!
P
A good pair of crimping pliers are also essential for those who use pin, spade, etc. terminals. Another good label maker is the Dymo LetraTag.